How to Tell If Your Child Is Ready for Preschool
Parents often wonder when their child is prepared for a structured early learning setting. Preschool introduces new routines, peer interactions, basic academic foundations, and a level of independence that children gradually develop.
Determining readiness takes more than knowing your child’s age—it requires observing behavior, communication skills, emotional patterns, and the ability to follow predictable routines. Many of these signs help families determine whether their child is ready to thrive in a KLA preschool or any other early learning environment.
Children today encounter many early education options, each emphasizing creativity, hands-on exploration, and child-centered learning. Parents benefit from understanding developmental milestones before enrollment. Readiness involves emotional maturity, curiosity, attention span, physical coordination, and social comfort. Recognizing these elements helps families make smart decisions that support long-term growth..
Understanding Social and Emotional Maturity for Classroom Life
Preschool introduces a consistent schedule filled with group activities, cooperative play, and problem-solving. Children who show interest in engaging with peers usually adjust comfortably. Look for behaviors like sharing a toy, taking turns without frustration, or showing excitement about playing with other children. These patterns often reveal your child’s comfort with group settings.
Emotional readiness also matters. A preschool environment challenges children with transitions from one activity to another. Those who recover quickly from minor disappointments or communicate their needs clearly respond more successfully to structured routines. If your child handles small frustrations without extended outbursts, they are likely ready to begin a preschool journey.
Evaluating Language and Communication Skills for Learning Success
Preschool teachers guide children through stories, conversations, songs, and instructions. Kids thrive when they can communicate basic needs and understand simple statements. Look for progress in vocabulary growth, clear pronunciation, and the ability to follow two- or three-step directions. Even short phrases such as “I want a snack” or “I’m going outside” indicate awareness of personal needs and comfort with verbal expression.
Strong listening skills are equally important. A child who listens when someone speaks, waits for their turn to respond, or reacts appropriately to a short question will typically handle preschool tasks with confidence.
Observing Independence Skills That Support Daily Routines
Preschool requires basic self-management abilities that develop during toddlerhood. Independence doesn’t mean complete autonomy, it simply means showing age-appropriate progress. Parents should check for abilities like washing hands, placing belongings in a cubby, eating independently, and recognizing personal items.
Toileting skills are another key factor. Many programs expect children to use the bathroom with minimal assistance. Practicing at home until they feel consistent and comfortable helps support a smoother transition.
Recognizing Cognitive Curiosity and Early Learning Indicators
Children who enjoy discovering new concepts usually respond well to a preschool classroom. Notice how often your child asks questions, explores objects, attempts puzzles, enjoys picture books, or participates in pretend play. These behaviors signal curiosity, which fuels early learning.
Attention span also influences readiness. Preschool lessons are short, but children need enough focus to participate. A child who listens to a short story, completes a simple activity, or concentrates on a toy for several minutes is showing good cognitive engagement.
Assessing Physical Development and Motor Skills
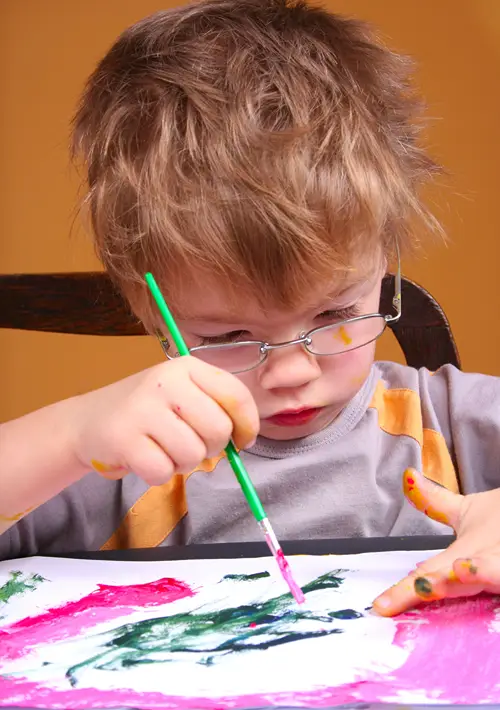
Motor skills support a child’s ability to participate in activities like drawing, climbing, building blocks, and outdoor play. Parents can look for steady progress in both fine and gross motor skills. Fine motor strength appears through tasks like holding crayons, stacking small objects, or turning pages. Gross motor coordination emerges when children run, jump, climb playground steps, or throw a soft ball.
Preschool days include movement, art, sensory projects, and hands-on learning. Children who demonstrate comfort with these skills adapt quickly to classroom expectations.
Preparing Your Child Emotionally for the First Separation
Separation from family represents one of the biggest challenges for preschoolers. Children who handle brief separations with familiar adults often transition more easily. Parents can prepare gradually. Short playdates, supervised activities without parents, or story time at local libraries help children build trust with new caregivers. Consistent exposure to safe environments reduces anxiety and increases confidence.
Parents also influence readiness. Children sense parental stress, so calm, positive introductions to the idea of preschool help create a secure foundation.
Building a Smooth Transition for Miami Families
By evaluating social comfort, independence, communication ability, physical development, and emotional resilience, parents can get a clear picture of their child’s readiness for preschool. Every child develops at their own pace, and choosing a start time that aligns with their growth supports confidence, comfort, and long-term success.